How I Use the X-E4 for Street Photography
It has been over a year that I’ve owned the Fujifilm X-E4, and it’s a camera that I used quite a bit over that span of time. I’ve taken a lot of photos with this camera and I feel like my street photography went in a new direction the more I continued to shoot with it.
To be honest, there really isn’t much about this camera that’s revolutionary or drastically different than other Fujifilm cameras.
It’s a really simple camera, and that’s partly why it just works for what I do.
I don’t know if I’d really call this a review, but more of an experience post, I think is the better word to use, because this camera and how I use it extends from more than just the camera itself.
I feel like it might be more practical and useful for people thinking about getting this camera to hear me talk about the overall way I use the camera rather than go over all the specs and fine details that have been talked about on YouTube already by so many people.
You can check out my first look video back last year for that kind of stuff. (I am working on an XE-4 handbook that will cover the use of the camera, which will be available on my store. Check the bottom of this blog for updates on when this will be available).

THE KIT
Before we get started with settings and all of that fun stuff, we need to talk about the kit as a whole, because this camera doesn’t work for my applications with out these other pieces.
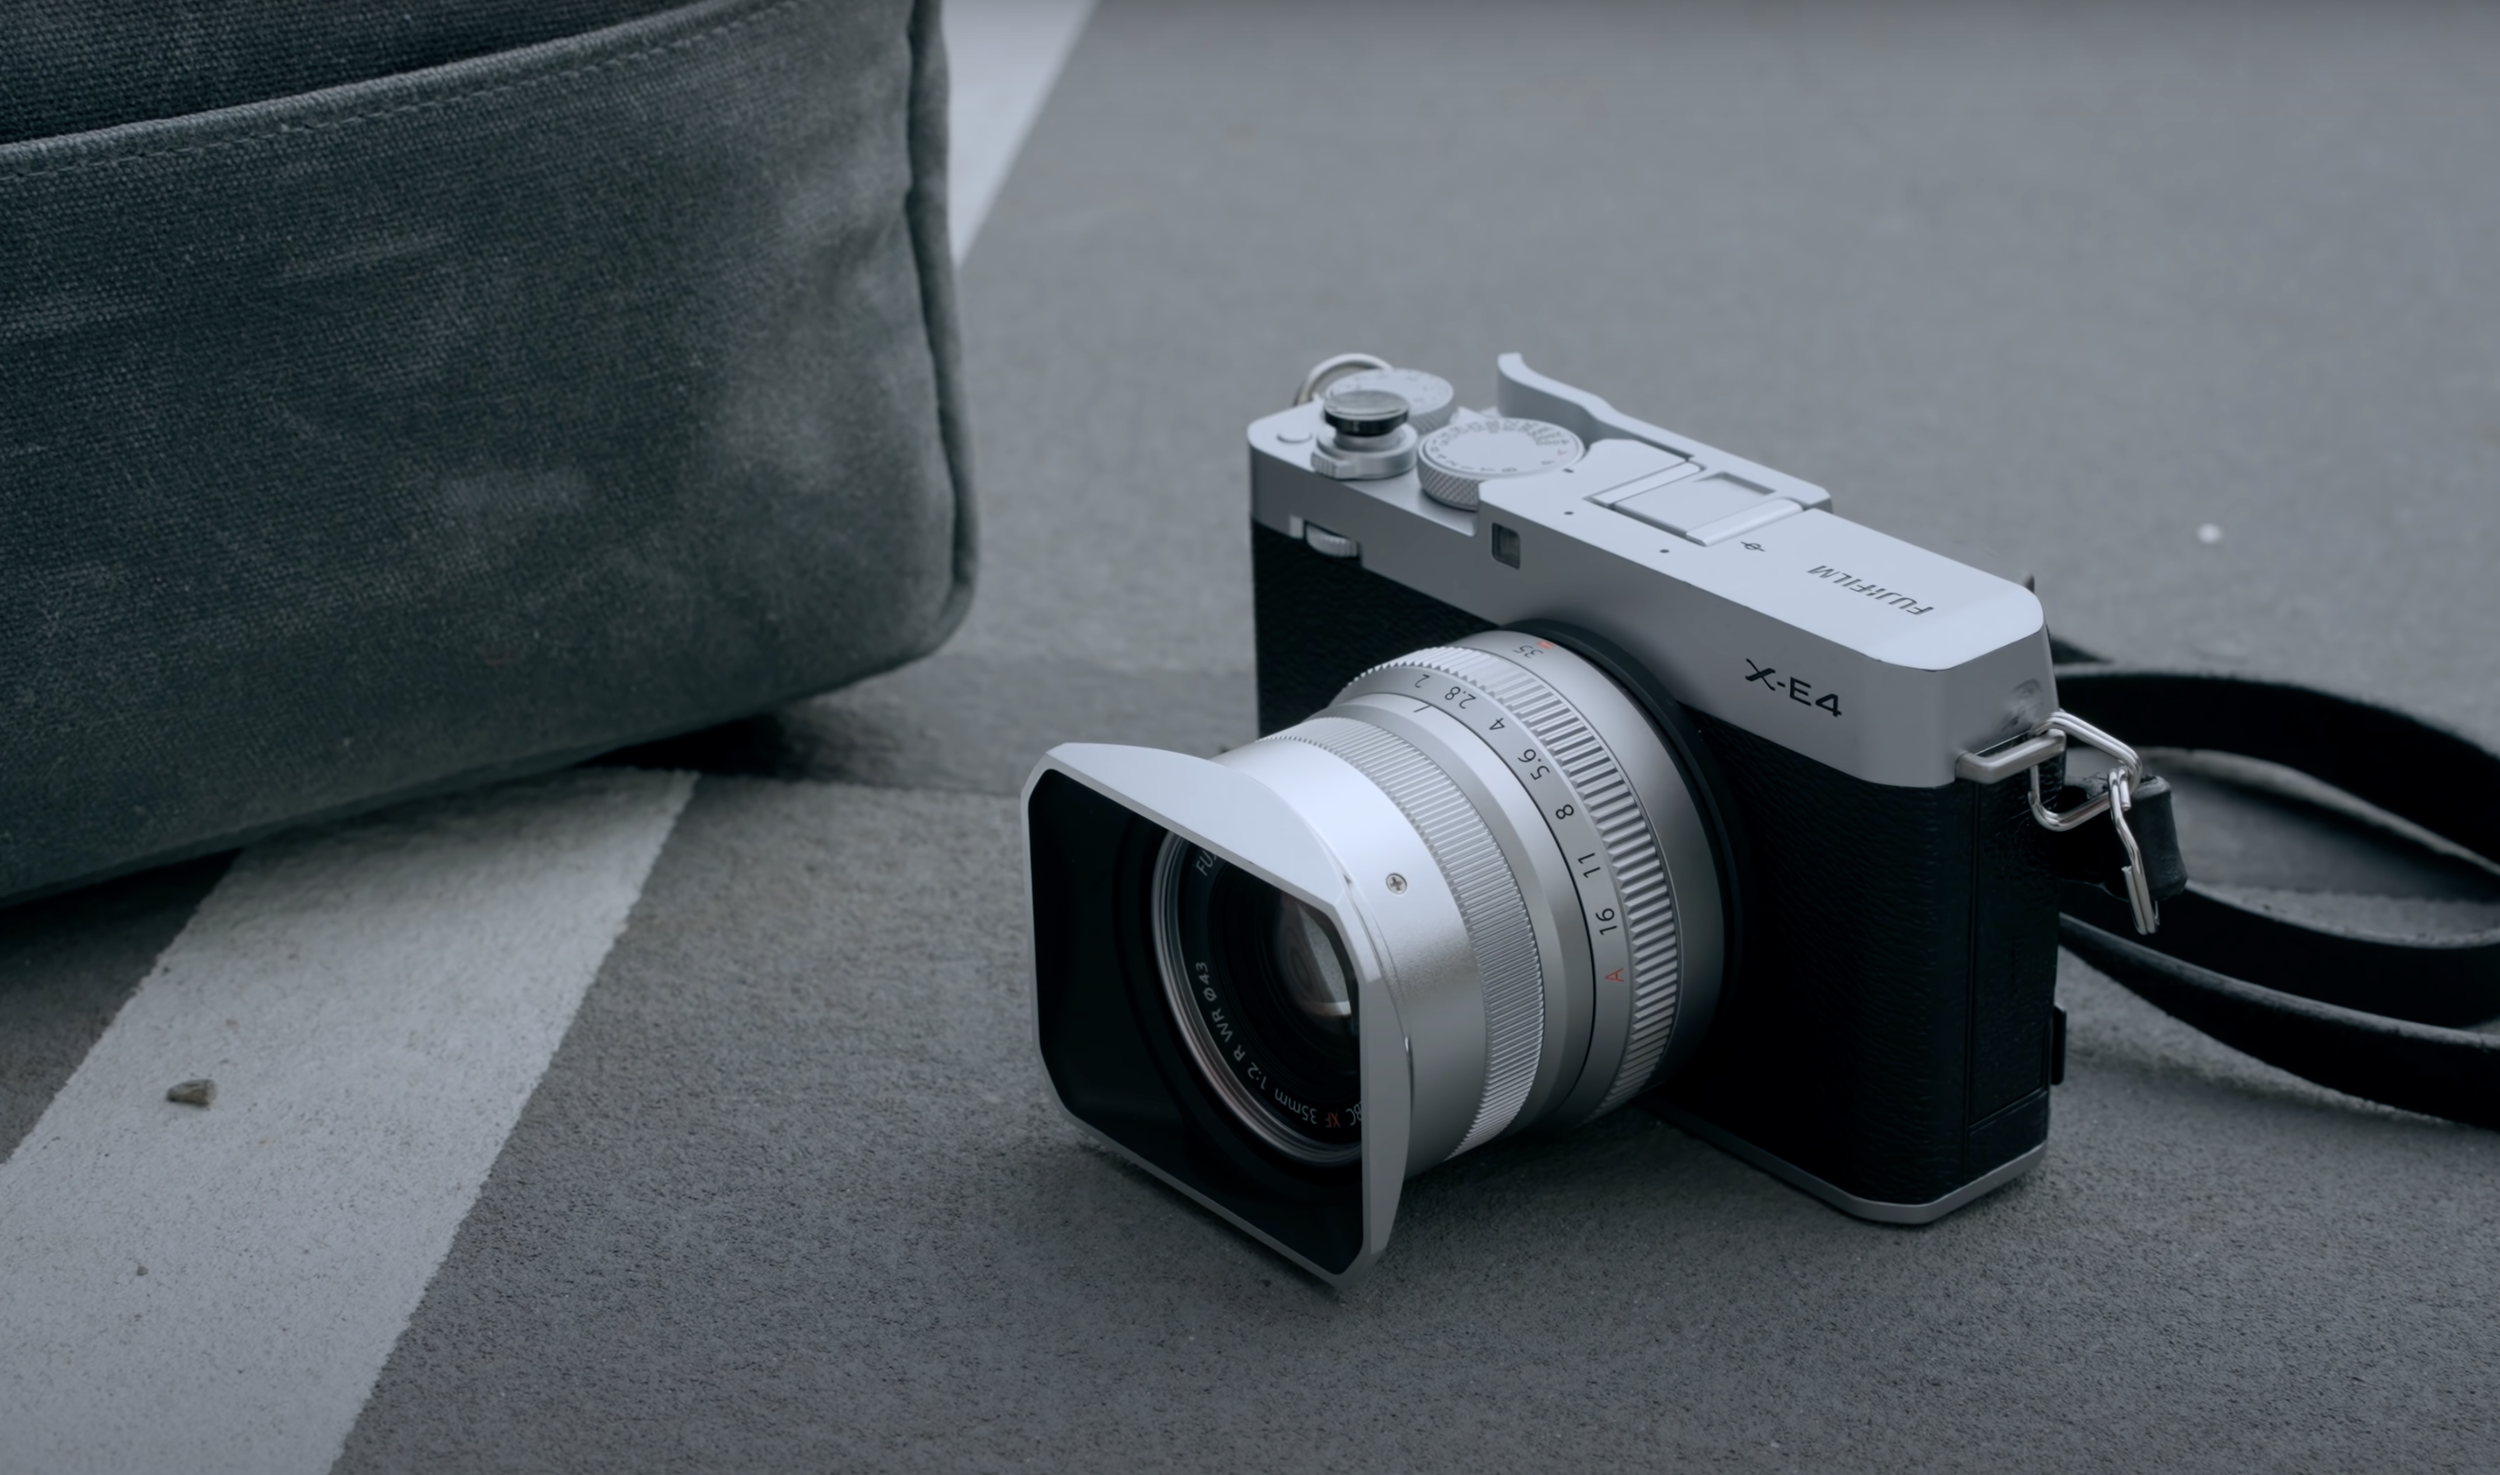
Most importantly, I use these three lenses with the FujifilmX-E4.
Fujifilm XF f27mm f/2.8 R WR - (full frame 41mm equivalent)
Fujifilm XF 35mm f/2 R WR - (full frame 53mm equivalent)
Fujifilm XF 50mm f/2 R WR - (full frame 76mm equivalent)
These are some of the most compact lenses you can own for a Fujifilm system and in my opinion, they work perfectly with the compact body of the X-E4.
They’re not the fastest Fujifilm lenses by any means, but for street photography and this compact camera body, I’ll take the smaller size over having a wider aperture and a bigger lens any day of the week.
It’s worth noting that they are all weather resistant too, however the X-E4’s body unfortunately is not weather sealed.
However, it might seem counter intuitive, but having a weather sealed lens on a non resistant body does does add some level of protection to arguably the most likely place water can get into your camera, your lens.
Still, I would not risk shooting with this camera in heavy rain, though.
I’m pretty happy with this trio of lenses. They all serve their own unique purpose for me.
The 35mm aka 53mm is my most used lens with the X-E4, it covers a focal length that I’ve really grown to enjoy shooting street photography with.
I have talked more in-depth about this in a previous video, but I feel like I see most of the world around me in the 50mm range, so it naturally works with the way I observe and shoot.
The 50mm (76mm equivalent) is the latest addition to the kit and really only serves one purpose, and that’s for when the 35mm (53mm equivalent) is just too wide for the type of abstract street compositions I want to take.
This lens takes it up a notch in focal length and really forces me to take a very slow and methodical approach to the street.
Lastly, there’s the XF27mm (41mm equivalent). It was a review model sent to me by Fujifilm and it turns out that it is my least used lens. I love a good pancake lens, but the focal length sits in a weird place with the other lenses I own as well as the X100V that I use. It’s too close to the focal length of the XF35 (53mm equivalent). I’m looking at possibly swapping this with the XF18mm pancake lens instead, that way I have a wider angle to use for street photography which provides an equivalent of a 28mm in full frame.
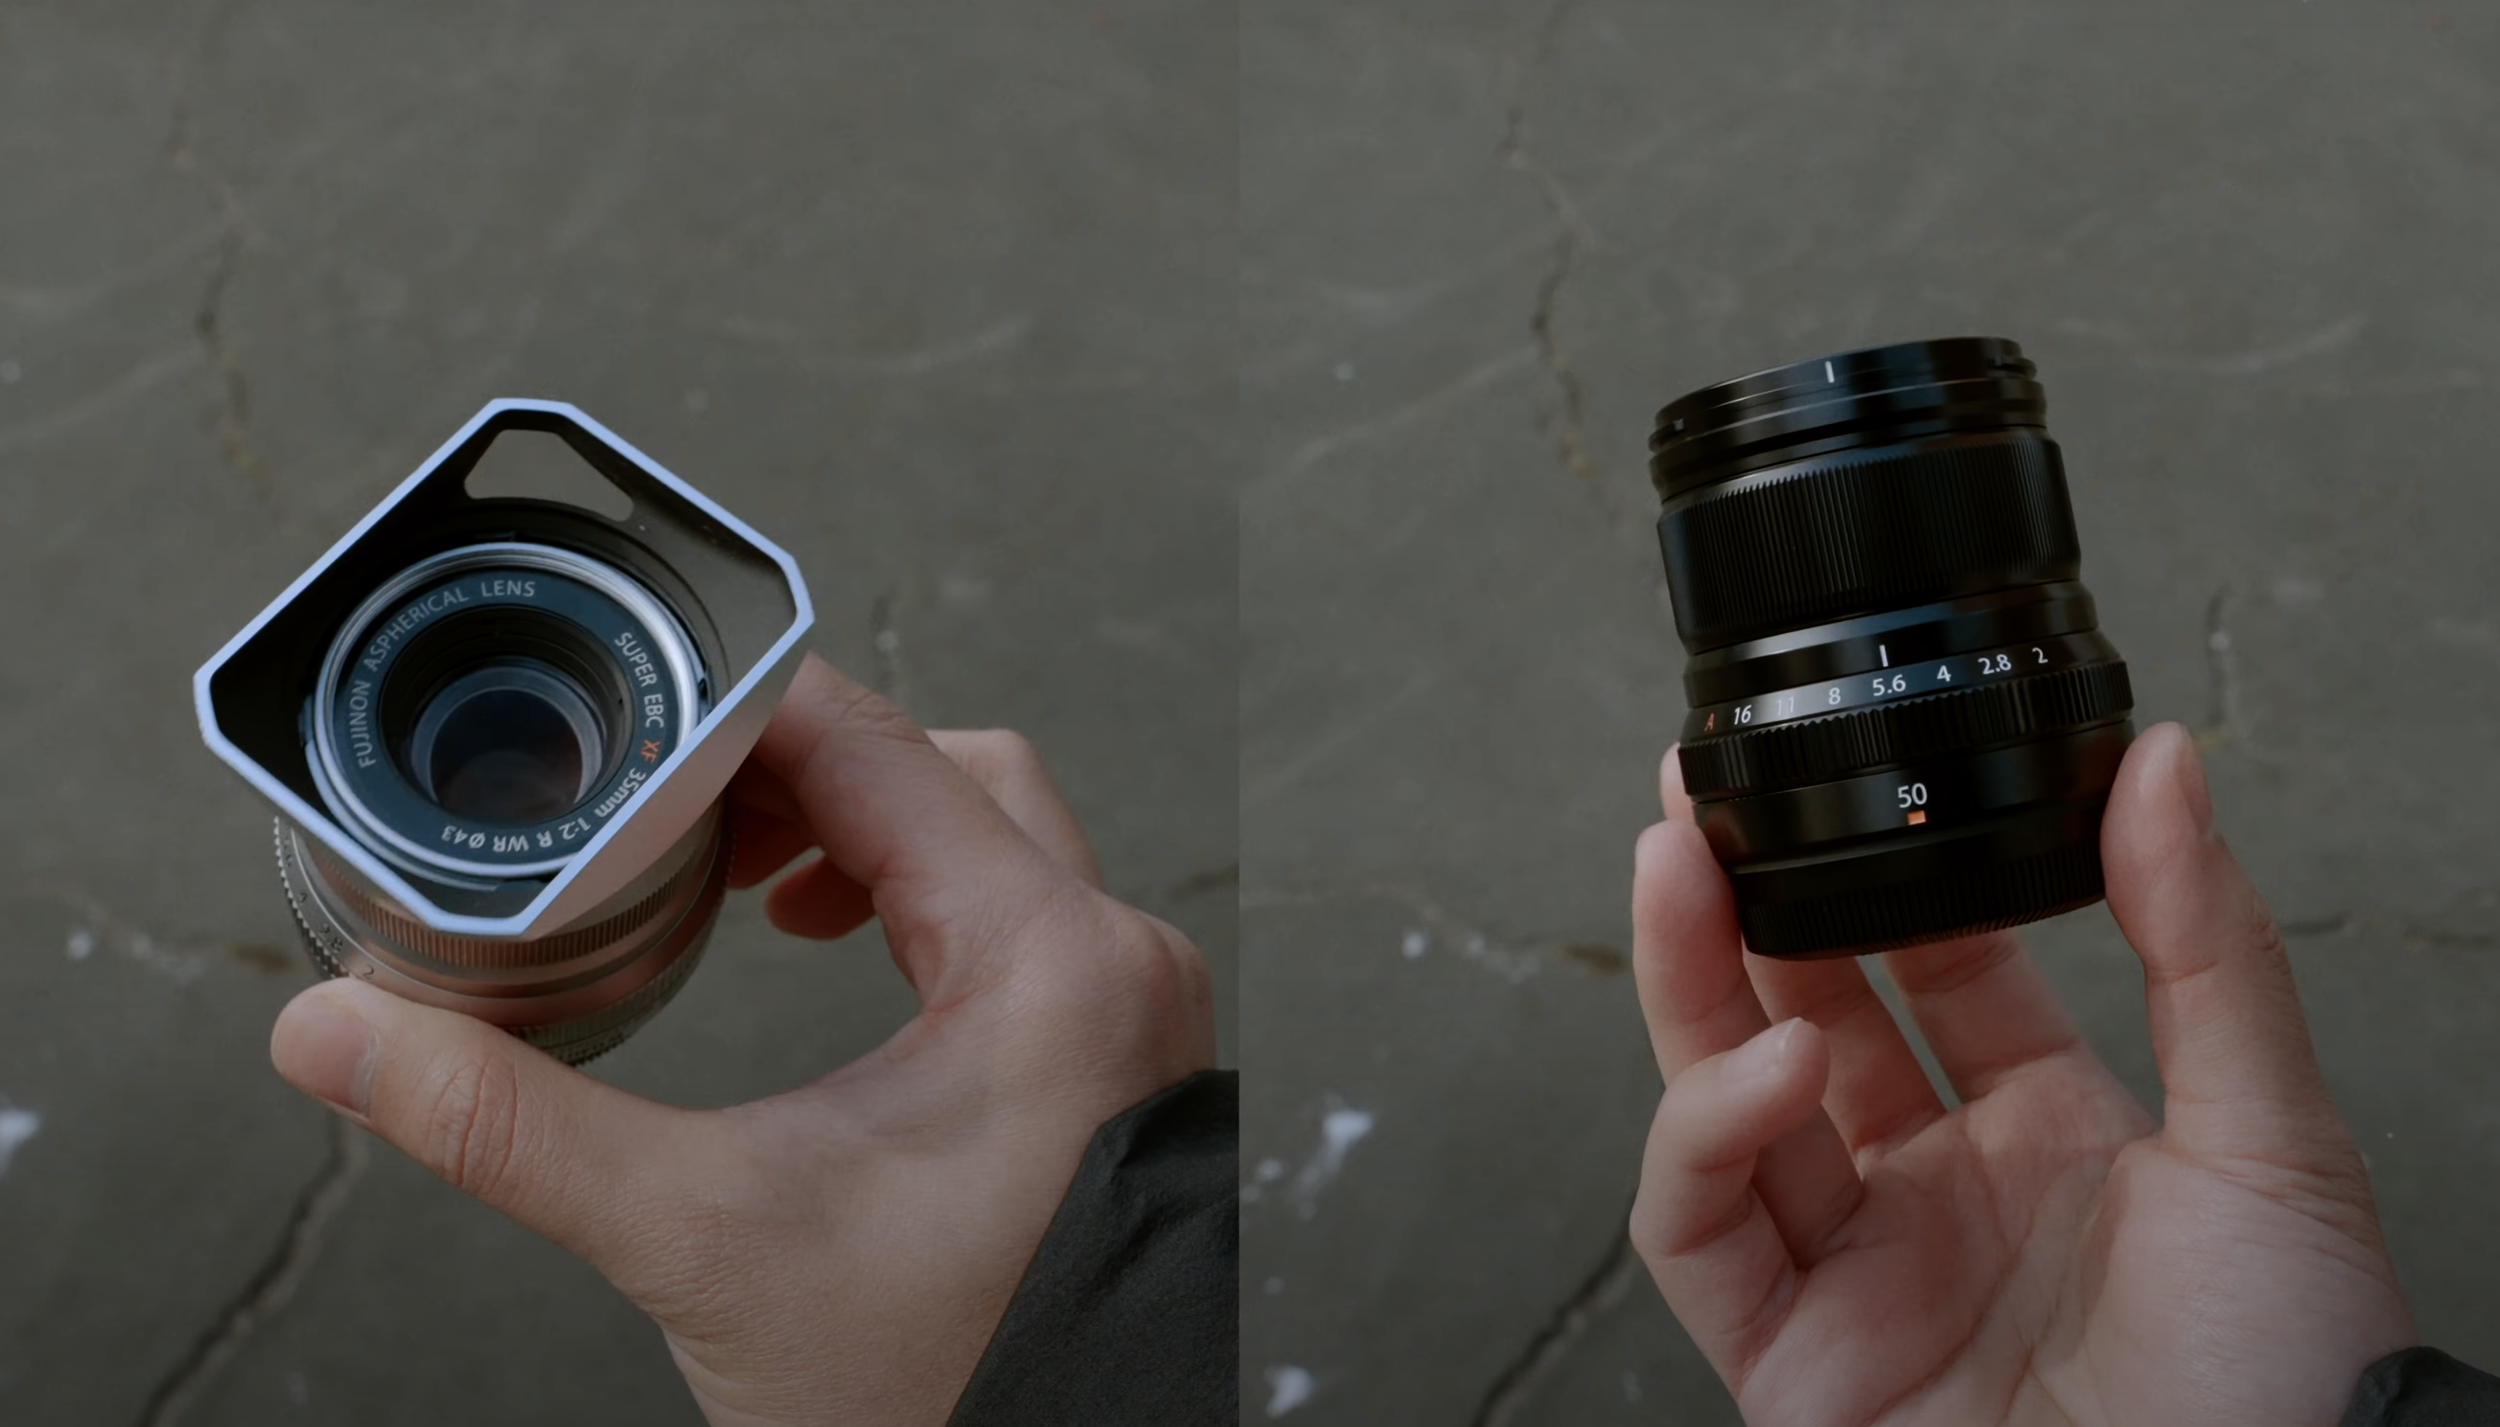
Fujifilm XF35mm f/2 WR lens & Fujifilm XF50mm f/2 WR lens
I usually bring a combo of two of these three lenses when I go out to shoot, but if I wanted to, they all would fit in my camera bag, which is pretty small to start with.
You might have a different experience with the X-E4, but in my opinion, the X-E4 lacks really any real ergonomics making it a bit difficult to have a firm grip on the camera. However, there are a few workarounds that I have found that make the camera have a much better feel when held. You can add as I have, thumb and hand grip attachments or you can go for a much sleeker approach with an adhesive applied grip.
For those wondering about the strap that I use in my video, it’s a custom model from Tap & Dye. If you want that nice worn leather feel right off the bat, I definitely recommend putting in an order at Justin’s shop.
FOCUS SETTINGS
My autofocus setup with the X-E4 primarily uses back button focusing paired with the AF+MF setting enabled.
One of the downgrades in the X-E4 was the removal of the AF switch button on the side. This makes it difficult for a lot of people using this camera to quickly switch from using autofocus to manual focus, but I find that when you set up back button focusing, you’re technically always shooting in auto focus and manual focus at the same time, so there’s really no reason to need a AF switch button.
Let me explain a little bit further if that’s confusing.
Most people have their cameras set to where you half press the shutter, the camera will start to focus.
When you use back button focusing, you disable the autofocus ability of the shutter button and reprogram your autofocus to the back button on your camera, in this instance the AE/AFL button on the X-E4.
Now when you half press the shutter, nothing happens.
The only way I can auto focus is by pressing this back button.
So now I can shoot and focus manually, but also have autofocus a click away.
The only downside to this is that taking a photo and having it be in focus is now a two button operation rather than just a one click operation since we turned off the shutter focus ability.
But I find it gives me more control over my auto focus and whether or not I want to refocus or not. To me it’s one of the ways I get to put more control into my hands over the process.
It can be frustrating when you have a subject in focus, but then you wait for the perfect time to take the photo or maybe recompose a little bit, when you hit the shutter it’s going to refocus again. The time it takes to refocus could end up ruining your photo or losing it altogether, but if you disable shutter focus you just take the shot without ever it refocusing out of your control.
So in short, these are the main settings I have applied for focusing this way
Shutter AF - OFF
Focus mode - MF
AF+MF - ON
MF Assist - Peak
Focus check - ON
PRE-AF - OFF

FUNCTION BUTTONS
There are a few key custom buttons I use on this camera.
Similar to how I have my X100V set up, I’ve programmed this custom button to my photometry settings.
I frequently go between matrix and spot metering depending on the environment I’m photographing.
If I’m looking to expose for the overall scene and get a balanced exposure, I’ll shoot in multi metering mode.
If I’m looking to photograph very bold shadows like in these photographs here, I’ll switch from multi metering to spot metering, and meter specifically for the highlights in the scene.
I also use this Q button on my X-E4 to to lock exposure.
That might be suprising to some, but there isn’t anything else I personally need to be stored in the quick menu.
I’d rather have another custom button as a quick way to lock exposure, and I’ll talk about this more in a bit.
I also make sure to disable the focus lever, because I’ve found it easily hit and unintentionally move your focus point.
That’s about it when it comes to function buttons on the camera. I feel like the X-E4 could use one more, that way you would still have access to the quick menu.

Photo taken with X-E4 & XF 35mm f/2 in NYC metro.
EXPOSURE SETTINGS
With the X-E4, I like to shoot in Aperture priority as well as Program Shift.
This camera is pretty great at determining a good exposure for the scene, so I really have no shame in using auto settings on this camera.
I find that it frees up time for me to be more focused on what’s around me as well as put more attention to working whatever scene I’m photographing, rather than fiddling with the camera to get a good exposure.
This is where having the Q button set to lock exposure comes into play.
Rather going the traditional way of holding your shutter down to lock exposure, I can hit this Q button, lock exposure and freely work a scene without having any of my settings change automatically.
If I need to readjust exposure, I’ll just unlock it by hitting the Q button again, let the camera re-expose for the scene, and then lock it again.
I find this works really well with the way I use this camera which is typically a slower approach to street photography.
DURABILITY

When it comes to the durability of this camera it's safe to say that I have definitely scraped mine up a bit, as mine now has a few dings on the side and on the front. On the silver version these are more visible. Something I find a little annoying about the design of this camera is that a lot of this damage is preventable if the strap loops were the regular type of strap loop that you see on most cameras. That way one would be able to use straps that have built-in protective bumpers. Something I've done to mitigate some of the scraping on the side is to use a triangle loop.
Lastly I want to touch on weather sealing this camera as it doesn’t have any. To be honest this wasn't a deal breaker for me because I don't really shoot in pouring rain all that often but there are times where I shoot in a little bit of a drizzle and this camera is fine in that kind of weather. The XF lenses that I own are weather sealed so that does provide a little bit of protection. I have found that even with weather sealing there is no real protection against water damage if the weather conditions are severe.

X-E4 or X100V?
I get a lot of questions from people on if I prefer the X-E4 over the X100V, or vise versa. Since I own both it's not an easy question for me to answer, but I understand where the question comes from.
I've been shooting with various focal lengths lately and I've really enjoyed that process, so I think that’s what it comes down to; if you are okay with a fixed 35mm lens or want to use other focal lengths. The X100V provides a level of simplicity and practicality that a lot of people like. If you're someone who might want to use other focal lengths then obviously go with the XE-4. It all comes down to what your shooting preference is.
If you are new to photography I would say the X-E4 is the better option here because it will provide you with the ability to try out different lenses and see what focal length suits you best.
The X100V is a more niche camera that I would only recommend to people who know what they’re getting into by limiting themselves to a single focal length and who want the benefits of a simplified approach to gear.

The X-E4 is still a very simple camera. I know I didn’t touch on video settings in here, but at it’s core, it’s a pure photography camera.
There are definitely some quirks and some things I wish were better, but there is no perfect camera that exists, or ever will.
At the end of the day, these are tools, and sometimes tools end up being replaced with better tools, ones that help us do the job. As much as we say “gear doesn’t matter” it does to the extent that you should always be using a camera that works for what you want to do.